Wednesday 22 October 2014

Clear Acne with Photoshop Retouching

For more amazing photoshop tips and tricks check out Janine's series' on Lynda.com! Here's a link to 7 days FREE  too!

B4&Aft
First published at TipSquirrel.com by Janine Smith

Unfortunately, acne’s a normal part of adolescence (and, more often than not, adulthood), one that can be quite embarrassing for the person sporting it. Sometimes, it’s just as painful looking back at photographs and seeing the cursed red spots. My son, Jason, had terrible acne when he was in junior high, until he went to a dermatologist to take care of it. To this day, he’s still embarrassed to see those old pictures. So, even amongst all the discussion out there over whether using Photoshop to manipulate a photograph is good or bad, or ethical or not, maybe it’s not such a bad thing to do a little Photoshop magic on a senior photograph, or clean up a social media profile shot. Regardless of your personal opinion on that matter, I’m going to show you one way to erase a little acne in someone’s life. By the way, the photo I’ll be using for this tutorial is not my son, it’s a stock photo provided by our friends at Fotolia.

  Before

 The first thing you’ll want to do is to take as much of the red out from the acne and surrounding areas. That will make the actual removal of the blemishes very much easier. To do this, make a Hue / Saturation Adjustment layer. Since it is the red we’re trying to get rid of, set the drop down menu to Red. Now move the Hue slider to the left and then the right – the goal is to find the color that makes the acne stand out the most.

See the rest of this tutorial here

Friday 20 June 2014

Lightroom Adjustment Brush Presets

adjustment brush presetsby Michael Hoffman

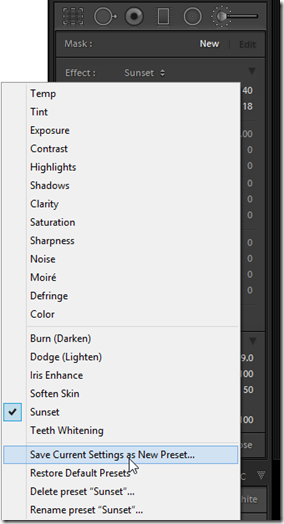
The introduction of the Local Adjustment Brush back in Lightroom 2 was the first step in transforming Lightroom from a global editor to a fully parametric, flexible content enhancement editor. The adjustment brush capabilities have improved with every release of Lightroom since then, but you may not have been aware of the existence of Adjustment Brush Presets. Adjustment Brush parameters can be set and reset at will, but Lightroom allows you to save specific settings together as an Adjustment Brush Preset. These presets may help you to speed your work and to operate more efficiently, especially in cases where you may be performing similar edits across many images. Check out the video for tips on using, creating and managing Adjustment Brush Presets. Lightroom Adjustment Brush Presets are not as powerful and flexible as their Photoshop brush cousins, but they are still quite useful. Keep in mind the main limitation of the Adjustment Brush Presets:

Adjustment Brush Presets store develop parameters only!


The Adjustment Brush Presets don’t contain brush tip parameters such as size, density, flow or feather. Furthermore, the actual shape of the area you have brushed on your image isn’t stored in the preset. With those limitations in mind, you’re ready to begin to use and create Lightroom Adjustment Brush Presets, as demonstrated here in the video. If you want to see more creative tips, check out my video on Lightroom adjustment brush tricks.


First published at TipSquirrel.com

Wednesday 18 June 2014

Easy Folded Banner Vector Shape in Photoshop

logo_banner
First published at TipSquirrel.com by Eric Renno

The folded banner is a popular feature at the moment so it was no surprise that I was asked if I could come up with an easy way to create one. The result is not only easy but is created entirely with vectors which means its scalable while remaining  completely editable. Don't panic if you're not used to using vectors, there's nothing that a beginner won't be able to handle here, yes I use the Pen tool but to make just a single click. The circular 'Coffee' logo here is the result of another tutorial, Text on a Circular Path which you can find here. This tutorial was produced in response to a reader question. If you have a question you can email, comment or use the contact page to drop us a note.

Friday 9 May 2014

What Are Linked Smart Objects?


01_linked_smart_objects_photoshop

Originally posted at TipSquirrel.com 

Photoshop Nut : Eric Renno

In a recent update to Photoshop CC Adobe introduced Linked Smart Objects. They work the same as Smart objects but with a unique, and helpful difference, they link back to the source, let's look at an example; (Not familiar with regular Smart Objects? Here's an explanation)


   02_linked_smart_objects_photoshop


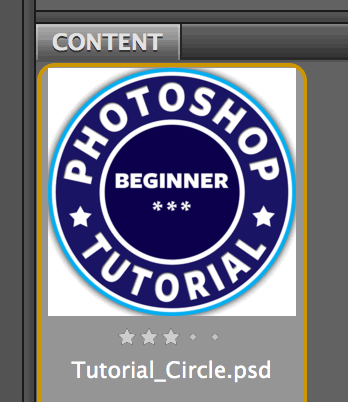
Here I've got an image that I'd like to add a symbol to. Its a separate file and labels this image as a Photoshop Tutorial for beginners. Here it is in Bridge;


03_linked_smart_objects_photoshop


I could Place this as normal, but for this I wonder if I might need to change it later, so I'll use the new Place Linked from within Photoshop;


01_linked_smart_objects_photoshop


I browse as normal and choose the relevant file to Place it into Photoshop.


04_linked_smart_objects_photoshop


05_linked_smart_objects_photoshop


You'll notice that it looks just and behaves like a normal Smart Object.


  06_linked_smart_objects_photoshop


 No change as yet, until we click the tick at the top of the screen, or press return to accept the Smart Object. In the Layers Panel you'll see that the Smart object is there but it has a chain on it rather than that 'sticky note' icon we usually have. This tells us this is a Linked Smart Object.


  07_linked_smart_objects_photoshop


Now I decide that this isn't a Beginners three star tutorial (whatever one of those is, maybe I should start grading them?) and want to change it. Well, as a Smart Object we can of course by double clicking it and opening it as if it were a separate document (If you're ahead of me here you'll know that that's exactly what it is).

Continue reading this tutorial at TipSquirrel.com --->>    

Thursday 8 May 2014

Steamy Window Effect in Photoshop

TS-Steamy
Originally posted at TipSquirrel.com 
Photoshop Nut : 
 

Photoshop has a fair few filters which, by themselves, seem pretty pointless and can do terrible things to your photos given half a chance.

However if you start mixing them together you’ll discover that they can in fact produce some pretty amazing effects.

In this tutorial I’ll show you how to create the impression of looking through a steamy, misted up window. We’ll use a bunch of standard Photoshop filters including the Fibres and Diffuse Glow effects.

If you’ve never used those before you’re not alone but it’s never too late to discover their power.


Click here to go to TipSquirrel.com

Monday 5 May 2014

Lightroom 5 – Keyboard Shortcuts

Lightroom 5 Keyboard Shortcuts
Originally posted at TipSquirrel.com 
Photoshop Nut : Michael Hoffman 

Everybody loves keyboard shortcuts, and today on TipSquirrel, we have Lightroom 5 Keyboard Shortcuts for you!

Learning keyboard shortcuts can help boost your productivity and can be the key to a smooth and consistent workflow. In addition, you’re taking some of the work away from your mouse, and that can be a benefit if you tend to suffer from repetitive motion stress.

There are a few Lightroom 5 keyboard shortcuts everyone should know – for example, the big three in my mind are “G, E, D” (for grid view, loupe view, and develop module view). And there’s “R” for the crop tool. But there are oh, so many more Lightroom 5 keyboard shortcuts.

The attached reference chart, in PDF format, is available for you to download, and it contains a list of no less than 6 pages of keyboard shortcuts, organized by Lightroom task, and easily searchable.


Sunday 13 April 2014

Photoshop Rounded Rectangles and Bender From Futurama


futurama Bender
Originally posted at TipSquirrel.com 

Photoshop Nut : Eric Renno

I recently created this Bender from Futurama as an exercise for a live class and posted the result on line. There was some interest so I thought I'd share it with all my TipSquirrel friends.

As mentioned in the video, the file is available, with all the finished layers and guides. You'll find it beneath the video in the 'Media locker' at TipSquirrel.com. (All this is is a way to share the post and keep the content free to all.)