
For more amazing photoshop tips and tricks check out Janine's series' on Lynda.com! Here's a link to 7 days FREE too!

First published at TipSquirrel.com by Janine Smith
Unfortunately, acne’s a normal part of adolescence (and, more often than not, adulthood), one that can be quite embarrassing for the person sporting it. Sometimes, it’s just as painful looking back at photographs and seeing the cursed red spots. My son, Jason, had terrible acne when he was in junior high, until he went to a dermatologist to take care of it. To this day, he’s still embarrassed to see those old pictures. So, even amongst all the discussion out there over whether using Photoshop to manipulate a photograph is good or bad, or ethical or not, maybe it’s not such a bad thing to do a little Photoshop magic on a senior photograph, or clean up a social media profile shot. Regardless of your personal opinion on that matter, I’m going to show you one way to erase a little acne in someone’s life. By the way, the photo I’ll be using for this tutorial is not my son, it’s a stock photo provided by our friends at Fotolia.
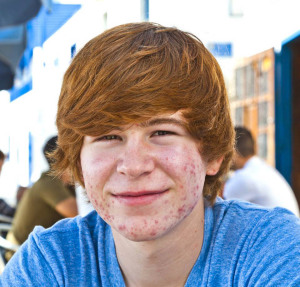
The first thing you’ll want to do is to take as much of the red out from the acne and surrounding areas. That will make the actual removal of the blemishes very much easier. To do this, make a Hue / Saturation Adjustment layer. Since it is the red we’re trying to get rid of, set the drop down menu to Red. Now move the Hue slider to the left and then the right – the goal is to find the color that makes the acne stand out the most.