Photoshop Nut : Janine Smith
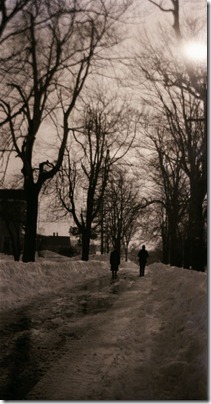
I recently put a photo up on Facebook and Twitter that generated a lot of buzz, using HDR Toning in Photoshop as a way to sharpen old photos. I discovered this method while working on the Adobe Prerelease of CS5. Previously I had been using the High Pass filter, but I’ve since pretty much shifted my loyalty over to HDR Toning. Why? It’s a bit more difficult in that you have to make a duplicate of the photo and flatten it, then drag and drop it into the original file when you’re done, but for me it’s absolutely worth the two minutes worth of extra work because of the presets and, most of all, because of the results! People were messaging and emailing me asking me what, exactly, I did for this particular photo. It’s really quick and simple and goes something like this: In the midst of a huge restoration project for a client, I found this really great photo. Apart from the normal age-related damage, it had some problems. The top of the photo had some blurring – maybe due to the wind moving the trees, and it was dark and rather murky, but I love the sun shining through the trees and the two men walking along the snowy road. I’ve used HDR Toning on a lot of photos since Photoshop CS5 came out and thought it might be just the thing to sharpen the photo a bit and really bring out some detail.
 After I did all the normal restoration bits (specks, dots, spots, etc.), I went to Image > Duplicate. Don’t worry about naming the duplicate image, it’s a throw away, so just hit OK.
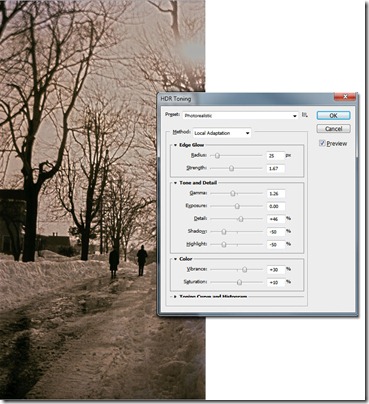
 Working on the duplicate, go back to the Image menu and select Adjustments, then HDR Toning. A pop-up will ask if you want to flatten the layers (assuming you have more than one, and since you hopefully won’t be doing your restoration work on the original layer, I’ll assume you do!). Click Yes.
 When the HDR Toning dialog box pop’s up, scroll through all the presets. There are a lot of sliders that adjust the Edge Glow, Tone and Detail and the Color; these are great to get to know and to experiment with to see how they can improve your photo, but for right now we’ll just go with a preset. I went with the Photorealistic preset, because I liked the way it sharpened up the trees without that heavy fringing that HDR can cause when not used lightly. The over-the-top HDR look has no place in photo restoration, in my opinion, but it can improve a photo if subtly done. Notice the sun looks pretty bad, but we’ll be taking care of that. After you’re decided what preset to use, click OK to close the dialog box.
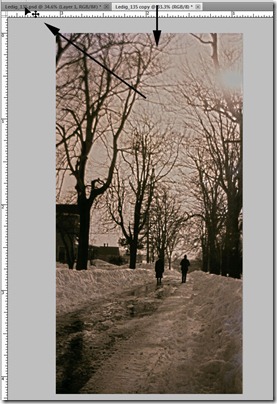
 Making sure the Move Tool is active, drag and drop your HDR toned duplicate layer into your original file. Be sure to press the Shift key before you let go of your left mouse key to drop it into the file, so the new layer is centered.
 To make things look a bit better, a Layer Blend Mode is definitely in order! As with the HDR Toning presets, scroll through the Layer Blend Modes, find the one that lightens (or darkens if appropriate for the photo you’re working on) the photo enough to see all the detail, while still maintaining, or adding, plenty of contrast. I went with Lighter Color, lowering the Opacity to 70%, because it brightened up the sky in a way I liked.
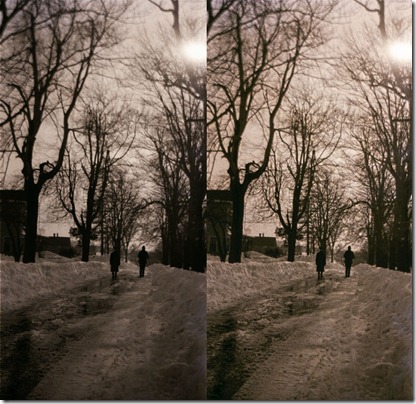
 It still needs something, though, so I’m going back to HDR Toning! This is how easy it is to go back for another round or see if something else works better for you; just go back to your duplicate image and hit Ctrl+Alt+Z, Cmd+Opt+Z on a Mac, once to delete the state change and you’re back to your flattened image, per-HDR Toning, all ready to start again! Image > Adjustments > HDR Toning again, and you’re ready to try another preset or move some sliders around. This time, I went with the Default preset because it totally brightened up the whole image!
 After dragging and dropping this layer into my original file and cycling through the Layer Blend Modes, I decided to keep the LB Mode on Normal, 100% Opacity. It gave it a little more of a rosy glow that I liked and lightened up the details just a wee bit more. When you’re done trying out the HDR Toning presets and sliders and have found a look you love, you can delete the duplicate layer.
 And that’s really all there is to it! I initially tried all the other methods, Curves, Blend Modes, etc. to bring out the details and make a good photo great, but this worked better and, frankly, was a lot easier! Give HDR Toning a try on your next restoration project!


No comments:
Post a Comment